About
One of the most fundamental applications of a transistor is using it to control the flow of power to another part of the circuit -- using it as an electric switch. The transistor can create the binary on/off effect of a switch.
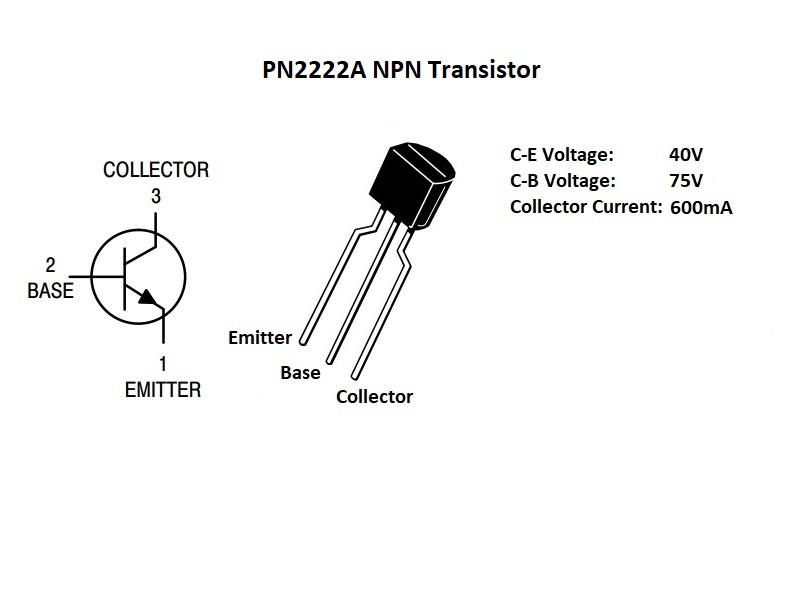
A small transistor like the PN2222 can be used as a switch that uses just a little current from the Arduino digital output to control the much bigger current of a motor.(Adapted from Sparkfun and Adafruit)
Good things to know, adapted from and courtesy of the Arduino website:
- BJT vs. (MOS)FET: These are different types of transistors. FETs (field-effect transistors) usually look a bit beefier, with a built-in heatsink. Each has three pins, but BJTs use the terms "collector, base, and emitter" for them, while FETs call them "source, gate, and drain".
- Collector: Similar to the positive leg on an LED, this is where power flows in.
- Base: This is the "trigger" pin coming from your controller, sensor, or whatever.
- Emitter: Like the negative leg on your LED, this is the ground side of your transistor.
Even transistors of similar types may put these legs in a different order, so double-check your part! An easy way is to Google image-search "[part number] pinout". Here's the PN2222A pinout:

- Part numbers: Make sure you grab the right transistors! You can Google the datasheet to be safe. Things to watch out for: it must be able to handle the power you're pushing through; double-check which way to hook it up; and it should be the right type (NPN or PNP). Use the first two rows engraved into the transistor. They can be hard to read; sorry.
- NPN vs. PNP: NPN transistors are normally "off" (disconnected), unless you're applying power to the base pin. PNP transistors are normally "on" (allowing current to flow), unless your signal is high.
Resources
Related Components