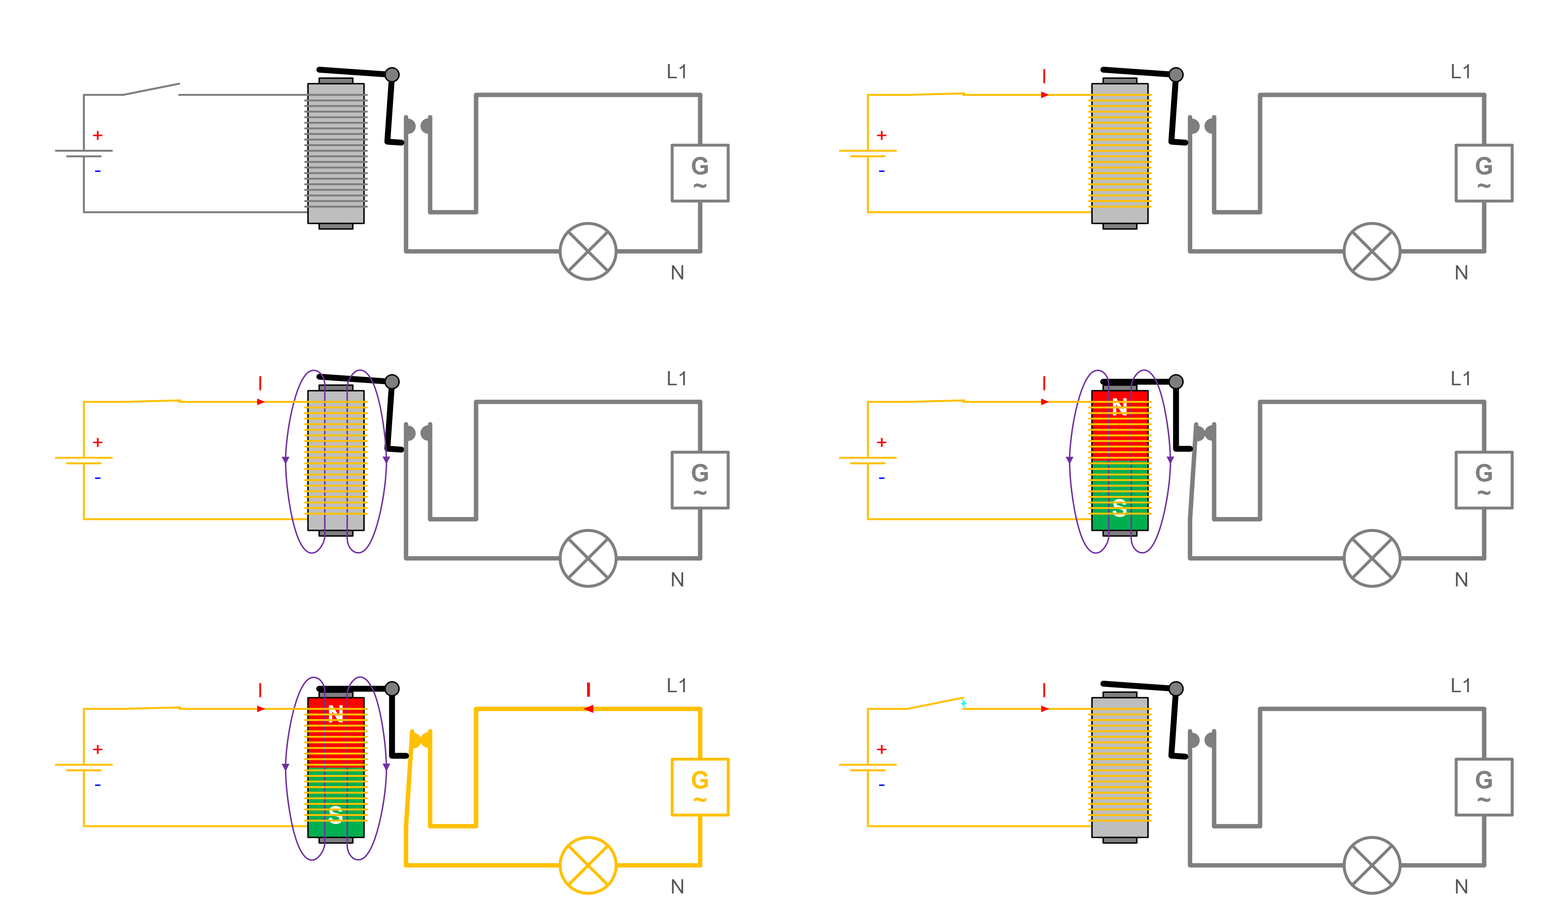
A relay is an electrically controlled switch.
When you need to switch a larger amount of power than the Arduino can handle or want to control an existing device separate from the Arduino. Note that most relays are mechanical and cannot switch more than a few times a second. A relay can be substituted for a mechanical switch in most circumstances.
A standard relay is a magnetically-controlled switch. On one side is an electromagnetic coil. When it receives power, this coil moves the contacts of a switch on the other side of the relay.
The magnet switches the middle COM (common) pin between the NC (normally closed), and NO (normally open) pins. This can be seen in the video above where the middle pin touches the NC pin on the right by default but is pushed toward the NO pin when the control pins are turned on.

The two control pins simply require a power source to activate the relay. This can be controlled with a digital pin.
The pins switched by the relay are typically COM, NC, and NO. These stand for common, normally closed, and normally open. Just like in the Lever Microswitch, these pins allow for two states of function: When the control pins do not receive power, the COM and NC pins are connected. When the control pins do receive power, the COM and NO pins are connected.

/*
 * This turns a relay connected to RELAY_PIN on and
 * off every 2 seconds.
 *
 * Created 2021-04-22 by Perry Naseck
 */

// Relay control pin connected to digital pin 13;
// this pin is also used by the onboard LED, so
// the LED should illuminate in time with the relay
const int RELAY_PIN = 13;

void setup() {
  // Set up the relay pin to be an output
  pinMode(RELAY_PIN, OUTPUT);
}

void loop() {
  // Turn on the relay
  digitalWrite(RELAY_PIN, HIGH);

  // Wait 1 second
  delay(1000);

  // Turn off the relay
  digitalWrite(RELAY_PIN, LOW);

  // Wait 1 second
  delay(1000);
}